Homemade chilli oil isn’t just a condiment—it’s a flavor powerhouse that transforms any dish with just a drizzle. Whether you’re adding depth to noodles, spicing up dumplings, or enhancing stir-fries, knowing how to make chilli oil at home gives you full control over flavor, heat level, and ingredients. Unlike many store-bought versions that rely on preservatives and artificial flavors, DIY chilli oil is customizable and preservative-free. You can choose your preferred chillies, adjust the spice intensity, and infuse the oil with aromatics like garlic, ginger, or Sichuan peppercorns for a personalized finish.
This guide walks you through the process step-by-step, ensuring you create a rich, fragrant, and long-lasting chilli oil tailored exactly to your taste.
1. Choose the Right Oil for Your Homemade Chilli Oil Recipe
The foundation of any good chilli oil is the cooking oil you choose. For making chilli oil at home, use neutral oils like grapeseed oil, canola oil, or peanut oil because they don’t overpower the spices with their own flavors. Avoid extra virgin olive oil as it has a low smoke point and a strong aroma that can interfere with the intended spicy profile. Aim for an oil with a high smoke point to safely infuse the spices without burning. The quantity typically used is about 1 to 1.5 cups of oil for ½ cup of crushed chilli flakes, but you can scale it based on how much you need.
2. Select the Best Dried Chillies and Aromatics for Flavored Chilli Oil
When learning how to make chilli oil at home, picking the right chillies is essential for both flavor and heat. Use a blend of Chinese Sichuan chillies, Kashmiri chillies, or Thai dried chillies depending on your heat preference and color vibrancy. Grind or crush the chillies coarsely – too fine and they can burn easily, too coarse and they won’t release enough flavor. Add aromatics like star anise, bay leaves, cinnamon, garlic, and Sichuan peppercorns to infuse complexity into the oil. Always toast these ingredients lightly before infusion to bring out their essential oils and fragrance.
3. Heat Control is Crucial for Making Chilli Oil Without Burning It
The key to a good chilli oil is gently heating the oil to the right temperature – around 110°C to 130°C (230°F to 266°F). This ensures the spices infuse without turning bitter. Start by warming the oil with whole aromatics for about 10–15 minutes on low to medium heat. Once the oil starts shimmering and the spices are fragrant but not burnt, remove the pan from heat and let it cool slightly (around 90°C) before pouring it over the chilli flakes. This step prevents the chillies from burning and becoming acrid, a common mistake in homemade chilli oil recipes.
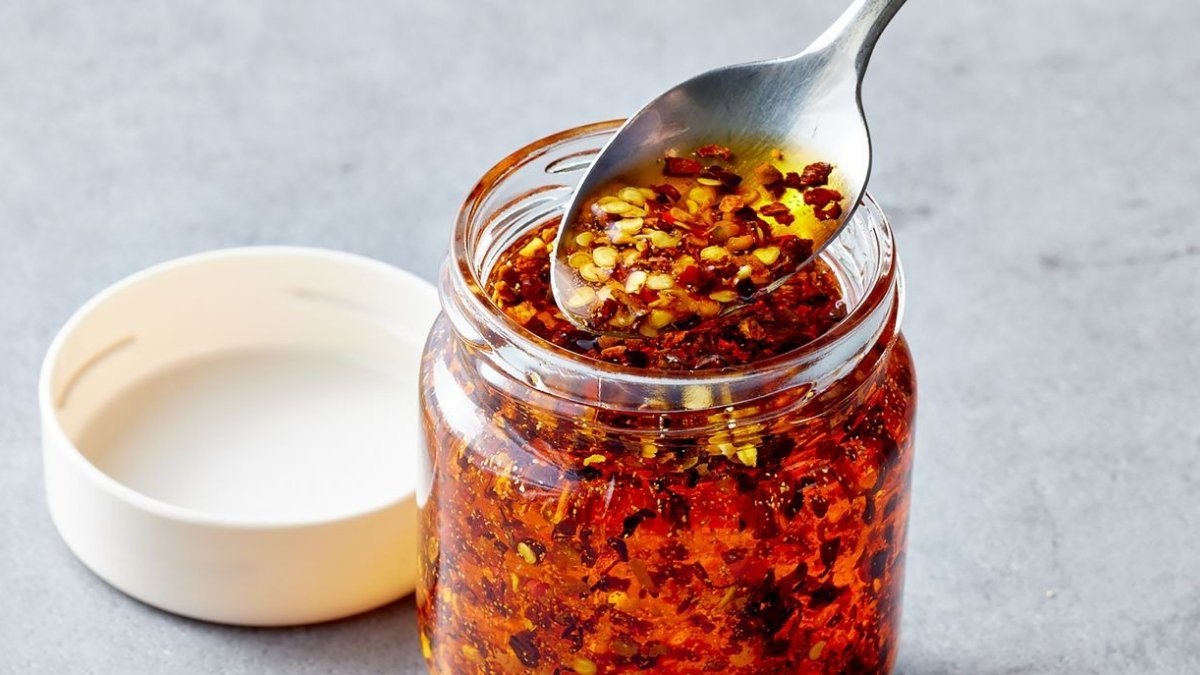
4. Strain or Keep the Solids: Deciding Your Homemade Chilli Oil Texture
A key decision when making chilli oil at home is whether to strain out the solids or leave them in. If you want a clean, clear oil ideal for drizzling, strain the oil using a fine mesh sieve after it cools. For a chunky chilli crisp texture, leave the crushed chillies and fried garlic in the jar – this gives the oil more body and makes it perfect for dumplings, noodles, or rice dishes. Some people even blend the infused solids into a paste to create a richer condiment. Store the oil in a sterilized, airtight glass jar and let it sit for at least 24 hours before first use to allow flavors to deepen.
5. Storage and Shelf Life of Homemade Chilli Oil for Maximum Freshness
Proper storage is essential to keep your homemade chilli oil safe and flavorful. Once cooled, transfer your oil to a clean, dry glass jar, preferably sterilized. Store it in a cool, dark place like a pantry or fridge. If the oil contains moisture-rich ingredients like fresh garlic or shallots, refrigeration is strongly recommended to prevent bacterial growth. On average, strained chilli oil can last up to 6 months, while oil with solids should be consumed within 2 to 3 weeks if not refrigerated. Always use clean, dry utensils to avoid contamination and extend shelf life.